
Tuesday, December 28, 2010
Happy Holidays!
Tuesday, December 21, 2010
Christmas Morning Breakfast!

I am particularly excited for Christmas morning this year now that Sofia is two years old and will be able to fully appreciate the surprise of seeing wrapped gifts appear under the tree. We are also starting our own family holiday traditions this year. One Italian tradition that I can't wait to share with my family is Panettone, an Italian sweet bread that is served during Christmas and New Year. You can make it from scratch or buy it at specialty markets like Whole Foods, Tonys Market, and Sunflower. My favorite comes from Williams-Sonoma. You can eat it simply toasted with a little butter but I love making it to French toast. This is a recipe I found many years ago and after the first bite I never had to try another!
Panettone French Toast w/ Coconut Milk
Ingredients:
1/2 vanilla bean
2/3 cup coconut milk
2 eggs, lightly beaten
2 tablespoons sugar
1/4 teaspoon ground cardamom
4 tablespoons butter
8 slices Panettone
Directions:
Split the vanilla bean in half lengthwise and scrape out the seeds. Put the coconut milk, eggs, sugar, vanilla seeds, and cardamom in a bowl and beat well. Pour the mixture in a shallow dish.
Heat half the butter in a large skillet. Dip 2 slices of Panettone into the egg mixture and saute until golden on both sides. Repeat with the remaining slices and serve dusted with confectioners' sugar.
To Serve:
confectioners' sugar for dusting
blueberries
yogurt
Wednesday, December 15, 2010
The Reinvention of Leftovers

I am always looking for creative ways to reinvent leftovers - this a big part of how I keep to a strict weekly grocery budget of $100-$150 a week. I make sure to use my leftovers instead of cooking every night and watching them just go to waste. It totally kills me when I throw away all my culinary creations on Monday morning to take out to the trash. It's a big money waster as well. So instead I plan all my meals a week at a time with leftovers included. It saves me a lot of time as well.
Here is a recipe I found Family Friendly Food that I can't wait to try. I often will buy an already roasted Chicken from Costco - they are really good and already cooked and give me a lot of options that don't take any time whatsoever.
Creamy Orecchiette with Roasted Vegetables, Chicken, and Leafy GreensLeftovers:
1/2 onion, small chopped
1/3 roasted whole chicken, pulled/cut to large bite-size pieces
3 breakfast sausages, diced
3-4 cups roasted vegetables (potatoes, yams, sweet potatoes, rutabagas), diced if not already
Blanched kale and chard, chopped
½ cup crème fraiche (substitute with heavy cream.)
1/3 cup grated cheese (mozzarella, monterrey jack, or parmesean)
Pantry items:
Olive oil
1 clove garlic
½ box of orecchiette or any kind of short pasta
Bring water and salt to a boil and cook the pasta according to the instructions on the box.
Meanwhile, in a big big skillet sauté onion in olive oil until it softens. Add the garlic clove. Move to the side of the skillet and add the leftovers. Warm it all up good.
When pasta is ready, drain and add to the leftovers, add salt, ground black pepper, and crème fraiche. Mix and toss it all together. Serve with grated cheese.
Makes 6 servings
Tuesday, December 14, 2010
Scrumptious Flourless Cookies
Scrumptious Flourless Cookies
3 large, ripe bananas, mashed
1 tsp vanilla extract
1 cup coconut oil, barely warm (or, alternatively olive oil or 1/2 c coconut oil and 1/2 cup grapeseed)
2 cups rolled oats
2/3 cup almond meal
1/3 cup coconut, finely shredded and unsweetened
1/2 tsp cinnamon
1/2 tsp salt
1 tsp baking powder
6-7 oz semi sweet chocolate chips or dark chocolate bar chopped
Preheat oven to 350 degrees, racks in top third.
In large bowl combine bananas, vanilla extract, coconut oil, and grapeseed oil if using. Set aside. In another bowl whisk together all dry ingredients except chocolate. Add dry to wet and stir until combined. Fold in chocolate chunks/ chips. The dough is looser than a standard cookie dough, don't worry about this. Drop dollops of the dough, each about 2 tsp in size, an inch apart, onto a parchment or Silpat lined baking sheet. Bake for 12-14 min. Makes about 3 dozen bite-sized cookies.
Thursday, December 9, 2010
Tis the Season ...

As a mom, the thing I notice most about the winter months is the frequency in which kids get sick and how hard we try our best to stop it from happening repeatedly. I am a firm believer that you can feed your kids foods full of vitamins and minerals such as Vitamin C, Zinc, Omega-3 Fatty Acids, and Vitamin E to help boost your kids immune system. I also believe it is okay for kids to get sick because it is also a way to build their immune system, however ask any mom of a kid who seemingly catches everything and appears to spend the entire winter with one long cold and she would probably beg to differ. Children also tend to get sick back to back due to their immune system being weak after being sick and the tendency to not eat well when they don't feel well. So this is the time to bump up their nutrition and make certain you are doing your best to help them get healthy quickly. I am a big fan of using smoothies to add nutrition and make certain my daughter is getting plenty of vitamins and minerals. Since kids appetites are so erratic I like to use healthy homemade smoothies as a way of making sure she is getting everything she needs especially when she is getting over an illness. Here's one from Dr. Sears that is full of ingredients to make sure your little one has what they need to stay healthy this winter. You can substitute ingredients as needed according to your kids age.
IMMUNE BOOSTING SMOOTHIE
*Drink this smoothie daily upon school entry in September, upon beginning daycare, upon exposure to a contagious illness, or when you or your child feels a cold coming on.
2 cups milk or soy or rice beverage
1 cup plain nonfat yogurt
1 serving of a multinutrient supplement (go to www.askdrsears.com for info)
one frozen banana, cut up
1/2 cup frozen blueberries
1/2 cup each of your favorite fruit, frozen (e.g., organic strawberries, papaya, mango)
1 tbsp. flax oil or 2 tbsp. flaxseed meal (Because fiber steadies the absorption of carbohydrates and therefore contributes to a steadier blood sugar we suggest using rich sources of fiber, such as flaxseed meal (i.e., ground flax seeds, containing both the oil and fiber), although flax oil has a more palatable consistency than flaxseed meal. For additional fiber, if you don't mind an even grainier texture, add 1 tbsp. or more of oat bran.)
3 ounces tofu
10 mg. zinc
100 mcg. selenium
50-100 IU vitamin E
1 serving soy isolate powder (optional)
2 tbsp. peanut butter (optional)
Combine all the ingredients and blend until smooth. Serve immediately after blending while the mixture still has a bubbly milkshake-like consistency.
Wednesday, December 8, 2010
First Stir Class


Monday, December 6, 2010
Stir Opening Party

u

The Stir Cooking School opening party was this weekend, and boy, are we blown away by the new space Katy Hume has recently opened. It is beyond belief- retro modern, state of the art kitchen with individual islands for more hands on, and just plain fun! I can envision this place getting busy, and getting busy quickly. We had a great time serving dessert upstairs and seeing our families and friends there- we are so happy for Katy and are excited to start teaching out of this venue tomorrow night!


Thursday, December 2, 2010
Homemade Ornaments

We're looking for simple ways to celebrate the holiday season this year, and I think these homemade ornaments may be just the ticket. Check out the rest of the winter edition of Rythym of the Home for some homey, back-to-basics ideas for creating traditions with your little one.
Wednesday, December 1, 2010
New Cookbook on its Way!

I don't often write about a cookbook sight unseen, but the mere anticipation of this ones arrival on my doorstep has me too excited not to share. It's all about family meals and how to make them fun and easy and healthy and yummy and....well all those things that Mish+Mash stands for. It's really the core of why we do what we do, so yeah I'm pretty excited to read a cookbook that shares our mission. Plus its by the creators of Cookie Magazine - which I am still mourning the loss of along with Domino - two magazines I have yet to find proper replacements for. But now at least I can savor a whole cookbook by these fabulous women and cook up all sorts of fabulous creations for my family. I will, of course, share every tasty detail with you all!!
Tuesday, November 30, 2010
Turkey Leftovers?

Potato Turkey Balls (Makes 18 Balls)
2 1/2 Cups Mashed Potatoes
2 Large Eggs, whisked in seperate bowls
1 Cup Roast Turkey Meat, chopped
1 Cup Cheese (Monterrey Jack, Mozzarella, or Cheddar), grated
1 Cup Breadcrumbs (white or wholewheat)
Gravy for dipping
1. Stir the mashed potatoes and 1 whisked egg in a bowl until combined and set aside.
2. In a seperate bowl, combine the chopped turkey meat and grated cheese stirring to combine.
3. Take 2 tsps of the turkey cheese mixture and form into 1 inch balls (you want to roll them tight so the turkey and cheese bind together).
4. Take 2 tbsp of the potato egg mixture and form a patty in the palm of your hand, place a turkey cheese ball in the center and fold the potato mixture around the turkey cheese ball to make a larger ball.
5. Place the second whisked egg in a bowl and the breadcrumbs in a seperate bowl.
6. Roll each potato ball gently into the egg and then into the breadcrumbs covering the balls completely.
7. Fry the potato balls for 60 seconds until the outside is crispy or bake at 400 degrees for 20 minutes.
8. Serve with gravy.
courtesy of www.weelicious.com

Turkey and Pancetta Pot Pies
Ingredients
Filling:
2 tablespoons extra-virgin olive oil
4 ounces finely diced pancetta
1 tablespoon unsalted butter, at room temperature
1 large or 2 small shallots, chopped
2 medium carrots, peeled and diced into 1/2-inch pieces
1 tablespoon chopped fresh thyme leaves
1/2 teaspoon kosher salt
1/2 teaspoon freshly ground black pepper
1/4 cup flour
2 1/2 cups low-sodium chicken broth
1/4 cup heavy cream
3 cups (about 14 ounces) roasted turkey breast meat, cut into 1/2-inch pieces
1 cup frozen peas, thawed
1/2 cup frozen corn, thawed
Crust:
3/4 cup flour, plus extra for dusting
1/4 cup cornmeal
1/4 teaspoon kosher salt
1 teaspoon baking powder
1/2 teaspoon baking soda
1 ounce (2 tablespoons) unsalted butter, cut into 1/2-inch cubes
1 cup grated Parmesan
1/3 cup buttermilk, plus extra, as needed
3 tablespoons extra-virgin olive oil
Special equipment: 6 (10-ounce) ramekins, each 2 1/2 inches tall and 3 1/2 inches in diameter. A 3-inch round cookie cutter
Directions
Place an oven rack in the center of the oven. Preheat the oven to 400 degrees F.
For the filling: In a large saucepan, heat the oil over medium-high heat. Add the pancetta and cook, stirring occasionally, until brown and crispy, about 8 minutes. Pour the pancetta and any cooking juices onto a paper towel-lined pate. Add the butter, shallots, carrots and thyme to the saucepan. Season with 1/4 teaspoon salt and 1/4 teaspoon pepper. Cook until the carrots are tender, 6 to 8 minutes. Stir in the flour and cook for 1 minute. Increase the heat to high. Add the chicken broth and scrape up the brown bits that cling to the bottom of the pan with a wooden spoon. Cook until the mixture thickens, about 3 minutes. Add the cooked pancetta, heavy cream, turkey, peas, corn, and the remaining salt and pepper. Simmer for 3 minutes until heated through. Using a ladle, fill the ramekins with the mixture.
For the crust: In a food processor, pulse together the flour, cornmeal, salt, baking powder, and baking soda. Add the butter and cheese and process until the mixture resembles coarse meal. With the machine running, add 1/3 cup buttermilk and the oil. Process until the mixture begins to form a ball, adding extra buttermilk, 1 teaspoon at a time, if needed. On a lightly floured work surface, roll out the dough into a 10-inch diameter circle, about 1/4-inch thick. Using a 3-inch round cookie cutter, cut the dough into 6 circles and place on top of the filling.
Bake until the crust is golden and the filling is bubbling, 20 to 25 minutes. Cool for 5 minutes before serving.
courtesy of Giada at Home via Food TV
I am always looking for some inspiration of what to do with Thanksgiving leftovers after the novelty has worn off. These are a couple I tried this year that I put in the freezer to pull out when I am in need of quick and easy meals. The potato balls I actually substituted the turkey with broccoli which will be great for a snack or lunch for Sofia. What do you all do with your Thanksgiving leftovers? We'd love to hear - simply share on our Facebook wall.
Keep it Local for the Holidays!
If you've never checked out all the wonderful homemade local gift fairs that Denver has to offer around the holidays you are in luck - this weekend two of my favorites are taking place. I love finding unique and special gifts for friends and family that do not require a trip to the mall. Plus you get the warm fuzzy feeling from supporting local artisans and supporting the talent that exists right in your community. Every city has them and I encourage you to seek out your own handmade markets in your town. Fancy Tiger is Denver's hub for all things cool and crafty with fantastic classes, events, and supplies. We heart them A LOT!

Fancy Tiger's Holiday Handmade
Craft Fair
.............................................
Holiday Handmade is back for the third year and better than ever! Fancy Tiger's Holiday Handmade is Denver's alternative craft fair featuring the work of 75 local emerging and established crafters. Holiday Handmade features knitting, crochet, printmaking, sculpture, ceramics, body care products, handspun yarn, quilting, sewing, felting, bookbinding, candles, soap and more!
When: Friday, December 3rd, 5 - 9pm and
Saturday, December 4th, 10am - 4pm
Where: Sherman Events Center, 1770 Sherman st.
What: Holiday craft fair featuring 65 of Colorado's most amazing handcrafters!

Valdez Elementary
on
December 4, 2010 – 10am-3pm
29th Ave between Zuni and Speer Blvd
2525 W 29th Ave
Denver , CO 80211
Details: The Winter Market & Holiday Fair is an arts, crafts, and gifts extravaganza for the holidays
*The Valdez Elementary Annual Pre-owned toy and book sale
*Kids’ Zone where kids of all ages can craft cool stuff
*Free activities including carnival games and interactive music
*Santa visit sponsored by Maribeth Dirksen-Turse Realtor
*Santa photos by Alison Rose Photography
*candid kids’ photos by Spree Photography
*drop-in infant care
*stroller check
*gift wrapping
*10% of food and drink proceeds benefit Valdez Elementary PTO
For more details, visit www.winter-market.com.
Monday, November 29, 2010
Blueberry Muffins

Why not try some healthier blueberry muffins this week as an alternative to the usual breakfast? Use a mini muffin tin for little hands and decrease baking time. I'm off to make some myself!
Monday, November 22, 2010
15% Off!

We're so excited to start teaching out of Stir Cooking School, and we're sure you'll love the venue and a fun night out if you participate in any of our workshops! One of the huge benefits of coming to a Mish Mash cooking class is the fact that you get family friendly, healthy food to take with you for your little one. Plus, you get to hang out with other parents!
For the months of December and January, any followers of our blog will receive 15% off of one Mish Mash class at Stir. (The same is true of our Facebook followers and members of Highlands Mommies). To receive the promo code, please email katy@stirtolearn.com before signing up on Stir's site. Just mention that you are a follower of our blog and want to sign up for a class!
Coming up in just a few weeks on December 7th: Ready Made Toddler Meals in a Snap. Just in time for the holidays, make yummy and healthy food for your toddler than can easily be grabbed on busy days or during holiday plans. (This is a make and take class). Plus, you'll get important information about keeping your busy and sometimes picky toddler well-fed all year long. Sign up today!
Also, an exciting announcement is that we are moving our puree classes to Stir. If you're interested in these popular workshops, keep an eye out for our first one January 22nd.
Wednesday, November 17, 2010
Parent Earth
I especially thought the video on cooking together with kids for Thanksgiving was timely: In it, regular adult holiday foods are easily made into baby food for the little one. We talk about this so much in our workshops. Enjoy!
Monday, November 15, 2010
Our First Stir Class... Coming Soon!

Announcing.... drum roll.... our first scheduled class at Stir Cooking School on December 7th! We'd love to get a few friendly faces in the door- watch for promotions we'll be offering on Facebook, our blog, and in our newsletter (if you haven't signed up, go to our web site to do so!). You will love this new cooking school. Sign up today! This isn't our only class, so you can also check out the whole schedule through January.
Class description:
The holidays are a busy time of the year, so take some of the stress out of the equation with ready to go wholesome and tasty meals and snacks for your little one. Mish+Mash homemade will help you prepare one breakfast, lunch, dinner, and snack option that can be frozen and reheated on the fly. This workshop is appropriate for parents of kid’s ages 14 months to 4 years of age.
| Menu: Breakfast : Oatmeal Apricot Breakfast Bites Lunch : Souper Duper Minestrone Dinner : Yum – O Chicken Nuggets with Butternutty Squash Cakes Snack : Peanut Butter & Jelly Time Mini Muffins For More Information visit: www.mishmashhomemade.com | |
| Price: $55.00/person |
Friday, November 12, 2010
Shepherd's Pie
It's a comfort food, for sure, but it's one that can feed your family for a few nights that also has a nice mix of veggies and protein for the upcoming chilly weekend. Plus, it's cheap and relatively healthy, especially because the beef is replaced with turkey. It's easy to mash this up for younger babies.
1 1/2 pounds potatoes
2 Tablespoons butter
splash of milk
3 Tablespoons extra virgin olive oil
1 onion
1/2 cup chopped celery hearts (I like to throw in some chopped celery leaves)
1 1/4 pounds ground turkey
1 cup vegetable stock
1 10oz. bag of frozen peas and carrots (organic)
1 Tablespoon flour
1 teaspoon dried thyme
1 teaspoon rosemary
1 teaspoon paprika
1 pinch of nutmeg
1 small cube of veggie bouillion
salt and pepper to taste
Preheat oven to 400 degrees.
Dice and boil the potatoes until tender (10 or 15 minutes). Mash with a fork, mixing in milk, butter, salt, and pepper. I keep on the skins (it’s better for you and looks better, I think) but you don’t have to.
While the potatoes are cooking, heat the oil in a large skillet. Add the onion and celery and cook until the onions are translucent (5 minutes or so). Add the turkey and cook through, stirring regularly and breaking up the meat (another 10 minutes or so). Add peas and carrots, vegetable stock and sprinkle with flour (this thickens everything up) and cook stir for a few more minutes. Add spices and let simmer and thicken for about five minutes.
Transfer to a medium-sized casserole or baking dish. Cover with the potatoes, making irregular peaks with a fork. Dab with a little of butter and garnish with chives or fresh parsley. Bake for about 30 minutes, uncovered.
Wednesday, November 10, 2010
8 Kid Foods to Double Check
Here's an interesting article on common kid foods that differ a lot depending upon the ingredients- they may seem healthy on the outside but it's definitely worth reading the labels on all of them, or for that matter, make your own (especially in the case of prepackaged lunches- come attend our Bento Box class at Stir to learn more!).
Tuesday, November 9, 2010
Tuscan Bean Salad
You could make a traditional tuna salad, and some kids really like that, but why not try a different twist that the adults can have over mixed greens? For younger kids, I'd probably dice this up a little in the food processor to mix the ingredients. You could even try putting this in a panini or melt for your toddler. This is healthier than the mayo version for adults who need a light option, and if your toddler doesn't feel like tuna today, it makes a great lunch for you!
Tuscan Bean Salad
1 pouch white tuna (3 oz)
1 can cannelini/ white beans, drained
1 large tomato, chopped
1/4 cup olive oil
2 T red onion, diced small
2 T red wine vinegar
1 tsp dried oregano
Mix all of the above and serve over lettuce or inside a sandwich. Pairs well with warm rolls on the side.
Monday, November 8, 2010
Busy Moms Need Easy, Healthy Recipes
This week, our focus will be recipes that can be made quickly and inexpensively that also match the rapidly cooling temperatures (we'll also keep them as healthy as possible).
Yesterday, it was one of those Sundays- the hubs was raking leaves and doing yardwork, the air was chilly, and I needed an easy something to make since I'm erring on the easy side of things lately (I'm 17 weeks pregnant). I found this recipe that I used to make in college, and thought it was worth trying again- hearty, healthy, and of course cheesy- what more could we ask for? Here you go! Hope you like it as much as the three of us did! This would be a great soup, blended a tiny bit, for 9-12 month olds also. Use organic frozen veggies- they're much better tasting and free of pesticides.
Vegetable Cheese Soup
2 tablespoons butter
1 9-10 oz russet potato peeled, diced
3 celery stalks, chopped
1 medium onion, chopped
1 1/4 tsp dried thyme
2 T all purpose flour
4 cups veggie broth
1 15 ounce can creamed corn (if you don't like the sugar content leave it out)
1 10 oz package frozen corn kernels
1 10 oz package frozen mixed veggies (you can really use any veggies here- green beans, broccoli, we used corn, peas, and carrots)
2 cups packed grated sharp cheddar cheese
1 tsp hot pepper sauce
chopped fresh parsley
Directions:
Melt butter in heavy large pot over medium high heat. Add potato, celery, onion, and thyme. Saute 5 minutes. Sprinkle flour over; stir 1 minute. Gradually mix in veggie broth. Add all vegetables and creamed corn and bring soup to boil. Reduce heat to medium low, cover, and simmer about 20 minutes until potatoes are tender. Remove from heat, add grated cheese and stir until smooth. Mix in hot pepper sauce, season to taste with salt and pepper. Ladle soup into bowls, sprinkle with chopped parsley.
Wednesday, November 3, 2010
To Sneak or Not to Sneak?
Friday, October 29, 2010
Upcoming Pureed Goodness Class

Are you or someone you know starting on the adventure of feeding solids to your little one? If so, our Pureed Goodness workshop at Spiral on November 6th from 1:30- 3:00 is the perfect solution! We've got a few slots left, and we'd love to have more participants. Parents will leave with 4 purees to freeze and try with baby (about 2 weeks worth of food for a baby just starting out) along with the knowledge and confidence to make their own baby food. This will probably be our last puree class at Spiral before the holidays.
If you know someone who might be interested, please forward this along. Signups can be at the workshop or online at Spiral Yoga and Wellness (be sure to click on workshops/events).
Thursday, October 28, 2010
Nobody's Perfect

When people know about our business, I have to chuckle a little when lunchtime comes, or it's time for Ava to eat, and they ask, "Do you allow her to eat ________?" Usually they're referring to a treat, or comfort food, or whatever the possible off-limits food is to the onlooker. I understand that they might infer that because we make healthy homemade food in our workshops, I may be a little controlling about what Ava eats.
While I appreciate their respectful questions, I laugh and explain that we have traditional snacks in our pantry sometimes too. Ava and I really love eating a good cookie (or more) and believe me, Nicole and I don't serve up something gourmet for every meal. But the honest truth is, I control what I can, and understand that a treat or super comfort food (fish and chips, anyone?) once in awhile is a necessary part of her diet- if I deprive her at all times, she'll just desire the "forbidden fruit" more. :)
My kid gets messy too, she throws healthy foods off the table too, and there are days she has food fixations. Yes, I have a plethora of recipes to try out on her, and she's a good eater, but we run low on ideas sometimes too. And then it's back to the drawing board to test out a recipe for the week (and usually it is just one recipe a week). As moms and dads, that's all we can do- keep trying to bring healthy foods to the dinner table, and over time, we will see that we have influenced our kids to appreciate eating well.
I think that's the beauty of Mish Mash- we try to equip parents to try out new healthy recipes so that they know that at the very least, they were able to influence the foods their kids eat every day. Even if it did get smooshed in their hair.
Do you have any pictures of your little one eating (er... semi-eating?) any Mish Mash recipes? Please do send them in for our site. We love seeing the fruits of our labor!
Wednesday, October 27, 2010
Off the Beaten Path

When thinking of a kid friendly place to eat out it's easy to get stuck in the rut of the old standbys. But I encourage you to take a look at those restaurants you may have thought were too cool for kids. Vesta Dipping Grill is just such a place. The atmosphere is hip and lively which is just perfect for keeping kids entertained long enough to enjoy a meal without having to pre-order the check. And their kids menu is fantastic with 3 courses for $8. The starter includes items such as veggies and dip, and for their entree you don't have to simply stick to chicken nuggets instead how about a beef skewer - food on a stick is a pretty exciting thing for a kid. We love Vesta and Sofia is very adventurous when there are different dips involved - maybe your kiddo will be, too.
Tuesday, October 26, 2010
Allergy Free Recipe!

Sarah and I are both very fortunate that neither of our girls have shown signs of having any food allergies. In our workshops and through our blog and Facebook page we have come across lots of parents with kiddos with all different types of food allergies and we feel your pain in trying to keep their food interesting, tasty, and healthy while keeping within those restrictions. We recently posted a pumpkin muffin recipe that lots of you tried and loved, so I wanted to find one for those with kids who couldn't partake in the ingredients and find a recipe that would work for you and is just as tasty. So here you all go. This one is dairy, gluten, egg, and nut free. So it should be safe for everyone. Once a week I will find other allergy friendly recipes to post. If there is something in particular you are challenged with let me know.
Pumpkin Muffins w/ Pumpkin Seed Streusel Topping
Ingredients
1/2 cup sugar
1/2 cup oil
1/3 cup applesauce
1 Tbsp vanilla
1 cup canned pumpkin
1/3 cup orange juice
1 tsp xanthan gum
3/4 cup tapioca starch/flour
1/2 cup sorghum flour
1/2 cup brown rice flour
2 Tbsp sweet rice flour (optional)
1 tsp baking soda
2 tsp baking powder
1 tsp nutmeg
1/2 tsp cinnamon
Streusel Topping:
1/3 cup roasted pumpkin seeds
1/4 cup brown sugar
2 Tbsp brown rice flour
1 tsp cinnamon
3 Tbsp margarine
Instructions
To make Streusel topping:
Chop pumpkin seeds in a food processor or blender until very small pieces. Most will be very fine grain, and will stick together, though some slightly larger pieces may remain. Combine chopped seeds, brown sugar, flour, and cinnamon in a small bowl. Cut in margarine until crumbly. Set aside.
Combine sugar, oil, applesauce, vanilla, canned pumpkin, and orange juice in a small bowl. In a separate bowl, combine remaining ingredients. Stir well to combine, then add the wet ingredients to the dry. Stir until completely combined, but do not overmix.
Fill muffin tins 1/2 to 2/3 full, then top with 1 heaping tablespoon of streusel topping.
Bake at 350 degrees for 25-30 minutes, until cake tester comes out clean, or the streusel is golden brown and the muffin springs back when touched.
Easy Breakfast, Lunch, or Dinner!

1 cup of milk
½ to ¾ lb. of grated cheese (a mixture of gruyere and white cheddar is my favorite!)
4 to 5 eggs, beaten
salt, pepper, dried or fresh herbs
two garlic cloves pressed or chopped
I use a combination of finely chopped tomatoes, spinach, salt, pepper, herbs and garlic sautéed in olive oil. But any combination of veggies will work. Use your favorite.
Arrange the veggies in the bottom of a quiche pan. There should be enough to cover the entire bottom.
Mix other ingredients together and pour over the veggies, spreading the mix evenly with a fork.
Place on a cookie sheet because it makes it easier to handle.
Bake in a 350 degree oven for about 40 minutes or until the center is firm and the top is golden brown.
Friday, October 22, 2010
Pumpkin Apple Muffins
Around here, we don't think of muffins as only breakfast- they are an easy snack or dessert also. When you put healthy yummy ingredients in them, you can rest assured they aren't chock full of sugar and fat- the following recipe is a great example. Pumpkin makes everything taste and smell more special this time of year, so give this awesome recipe a shot! Your house will smell wonderful.
Pumpkin Apple Muffins (12 Muffins or 24 Mini Muffins)
1 1/3 Cups All Purpose Flour
2/3 Cup Whole Wheat Flour
2 Tsp Baking Powder
1/2 Tsp Baking Soda
1/2 Tsp Salt
1 Tsp Cinnamon
1 Tsp Pumpkin Spice
3 Tbsp Vegetable or Canola Oil
1/2 Cup Agave OR Honey
1 Egg
1/2 Cup Milk
1/2 Cup Pumpkin Puree
1 Medium Apple, peeled and grated (Gala, Pink Lady, Fuji or Golden Delicious are good choices)
1. Preheat oven to 350 degrees.
2. Combine the first 7 ingredients in a bowl and mix.
3. In a separate bowl, whisk the remaining ingredients together.
4. Slowly add the flour mixture into the wet ingredients and stir until just combined.
5. Grease muffin tins or line them with muffin cups and fill each cup 3/4 full with the batter.
6. Bake for 20 minutes or until a toothpick comes out clean.
7. Serve.
Wednesday, October 20, 2010
Kids with Food Allergies
There are many different theories regarding the rise in food allergies and the relationship between allergens and toxins. Whatever theory you subscribe to having a kiddo with food allergies no matter how minor or extreme can be a challenge. A great online resource is www.allergykids.com. This is a great site for moms who want to gain more knowledge on how to deal with raising a child with a food allergy in a world full of forbidden foods. We would love to hear other moms reach out and let us know how they have dealt with raising a child who experiences sever or minor reactions to certain foods. I'm sure it will help other moms out there who are just starting to navigate this same journey to hear what you have to say. So post your story on our Facebook wall and for those of you with questions do the same, sometimes a little support can go a very long way. Here's a great recipe for those with and without allergies to enjoy!
Millet Salmon Cakes with Yogurt Dipping Sauce
Millet is known as a "super grain" because it is highly nutritious and easy to digest. People who have a tough time digesting wheat find millet a welcome alternative. It can be found in all health food stores and even some regular grocery stores. It's also delicious in the morning with cinnamon, berries, honey and almond milk.
Salmon Cake Ingredients:
3 Tbsp butter, divided
1/2 medium red onion, diced (approx 1/2 cup)
1/4 bulb of fennel, diced (appox 1/2 cup)
1 stalk celery, diced (approx 1/2 cup)
1/4 cup chopped parsley
1 lb salmon, skinned and steamed *
2 cups millet, cooked **
1/4 cup ground flax ***
1/2 cup chopped walnuts
2 tsp sea salt
1 tsp black pepper
1 tsp lemon zest
1 Tbsp dijon mustard
2 eggs
Salmon Cake Instructions:
Preheat oven to 400 degrees. Melt 2 Tbsp butter in a large non-stick pan over medium heat. Add onions, fennel and celery to the pan. Saute for 5 minutes, stirring occasionally, until veggies are beginning to soften. Remove from heat, stir in parsley and cool for 5 minutes. Flake salmon into a large bowl, being careful to remove any bones. In a separate small bowl, toss cooked millet with ground flax until millet is coated. Add millet/flax mixture and walnuts to salmon, set aside. In a small bowl, whisk together sea salt, pepper, lemon zest, dijon mustard and eggs. Add cooled sauteed vegetables to the salmon bowl and pour egg mixture over the salmon. Gently toss all ingredients together with a fork. Using approx 1/3 cup of the salmon mixture per patty, measure out and form 12 salmon patties.
Melt remaining 1 Tbsp of butter in the same large non-stick pan (no need to clean it) over medium heat. Add six salmon patties to the pan and saute for 10 minutes or until the bottoms are lightly browned. Using a spatula, gently flip cakes over onto a large non-stick sheet pan. There should still be enough oil in the pan, if not, add an additional 1 Tbsp of butter. Saute the second batch of salmon cakes, and add those to the sheet pan as well. Bake cakes for 8 minutes. While cakes are baking, mix together the yogurt dipping sauce.
Yogurt Dipping Sauce Ingredients:
1 7 oz container greek yogurt
2 scallions, thinly sliced using both white and green parts
1/4 tsp lemon zest
Juice of 1 lemon (approx 1/4 cup)
1/4 tsp dijon mustard
1/2 tsp sea salt
1/4 tsp black pepper
2 dashes cayenne pepper
Yogurt Dipping Sauce Instructions:
While salmon is baking, whisk all ingredients together in a small bowl. Chill until service. Makes 1 cup of sauce.
To Serve:
As an entree, serve 3 salmon cakes per person with 1/4 cup of yogurt dipping sauce on the side, drizzled over the cakes or under the cakes on the plate. As an appetizer, serve 1 salmon cake per person with a heaping Tbsp of sauce.
Enjoy! I think you will love these...
* I ask my fish monger at Whole Foods to steam the fish for me. It makes these cakes a simple weeknight meal. Or use a steamer basket over a pot of boiling water until fish is cooked through, 15-20 minutes. Or poach the fish in salted water for approximately 20 minutes until cooked through.
** How to cook millet: Rinse 1 cup of millet. Combine millet, 1 1/2 cups water and a pinch of sea salt in a medium saucepan. Bring to a boil. Cover and reduce to a simmer. Simmer for 20 minutes. Turn off heat. Take off lid and let sit for 10 minutes. Fluff with a fork and proceed with recipe!
*** Ground flax can be bought at most health food stores or Whole Foods. But, you can also buy whole flax seeds and grind them in a coffee grinder at home. This step retains more nutritional value of the flax. Flax seeds contain omega oils, which spoil quickly when they are subjected to air. Storing the seeds whole until you need them prevents spoilage.
ORGANIC SPARK
http://organicspark.blogspot.com/
Tuesday, October 19, 2010
Apple Fritters!
Okay, so usually we put some super healthy yet still super yummy recipe on here to share. But today with this amazing fall weather we are experiencing here in Colorado - a very rare non-frost, no random snow flakes kind of fall the likes of which we rarely ever see - I felt compelled to bake something sweet and sugary to enjoy outside in the grass with a couple of glasses of cider. Because sometimes a beautiful day calls for a decadent treat and these apple fritters definitely are just that!
Ingredients
(adapted from Southern Plate Cookbook)
2 cups self-rising flour
1/2 cup dark brown sugar
1 teaspoon Apple Pie Spice (substituted for cinnamon)
1 cup milk
3 TBS butter, melted
2 large eggs
2 medium Granny Smith apples, peeled and diced (substituted for 2 cups apples)
powdered sugar, optional
Before preparing the batter, I pulled out my trusty cast iron skillet and filled it about 1/2 inch deep with pure vegetable oil (add more for larger fritters like I made to avoid scorching the bottom of the fritters) and placed it over a medium heat (4 on an electric stove).
While the oil is heating, combine the flour, brown sugar and apple pie spice in a large mixing bowl. I used a fork (as suggested in the cookbook) to mix the ingredients and break up any clumps, which could probably be avoided by sifting the dry ingredients beforehand.
While the fritters would be incredible with just about any baking apple, I chose my all time favorite, the Granny Smith. It gave the fritters that extra little kick of sour to balance all of the sweetness of the batter.
Add the milk, butter and eggs to the dry ingredients and stir well. Add diced apples and stir.
With the batter and oil now ready, I used an ice cream scoop to add about 4 to 5 dollops of batter to the hot oil. My first batch turned out some rather large fritters, so for the additional ones, I only filled the scoop about half way.
At this point I wish I had used a timer so I could say exactly how long each side spent frying but I would guess it wasn’t anymore than 2 minutes per side, probably even less. I just used a metal straining spoon to lift the edge and see how brown it was getting every 30 seconds or so. Once brown, just carefully flip each fritter over to cook on the other side.
*recipe courtesy of Oh My Sugar High.
Even Mish+Mash homemade has a sweet tooth! Yum!!!!
Join the School Food Revolution!
If you haven't heard of it yet, Two Angry Moms, is new movie and a movement by two moms who decided to take the choices their kids had in the cafeteria and try to make a change.
Amy Kalafa was stewing for years, packing her kids lunches from home and trying to get her community to pay attention to what kids are eating in school. When news of a national child health crisis began making headlines, Amy, an award-winning documentary filmmaker, decided to take the fight to film. Two Angry Moms is Amy's quest to learn what she and other parents need to know and do to get better food in their kids' schools.
Whole Foods is sponsoring free screenings of this film all over the country and tomorrow night you can catch it at the Mayan.
Wednesday, October 20th
FREE MOVIE NIGHT at the Mayan Theatre Featuring "Two Angry Moms" A film about changing the way we do school Lunches!
7:00-9:00pm Free!
Join us for a special event hosted by Whole Foods Market! “Two Angry Moms” is the story of two moms and their quest to improve school lunches. Learn more about the School Lunch Revolution and the movie at www.angrymoms.org
Enjoy this Free Movie and then a panel discussion afterward to discuss ways to improve school wellness in your community!
If you are interested in bring this movie to your neighborhood or would like to be a part of this grassroots movement log onto www.angrymoms.org for all the details!
Friday, October 15, 2010
Vegetable Cards

We have a demo scheduled tonight, and we're excited about it; the topic is "How to Get Your Child to Eat Almost Anything"- specifically focused on veggies. We're not huge proponents of hiding vegetables, though we know there's a place for it and do have recipes that include veggies, either pureed or chopped fine. In fact, I've been playing with many such recipes recently and have discovered that one can even hide spinach and carrots in brownies! Yes, brownies!
This all has led me to ask- what are we at Mish Mash really about? We fall somewhere in the middle between raw veggies and hiding: We would rather kids learn from the start that veggies are a natural, tasty part of meal time to be enjoyed- and usually if they start by eating homemade veggie purees, there's more success with this. So our job is to give parents strategies to get there.
Still, there are always kids who really avoid veggies at certain stages, and it's important to give them ownership of meals and to help them to understand what they're eating, and get them talking about the vegetables, naming them, and helping you prepare them by washing or tossing them into salads or soups. That way they'll know the name at the dinner table, and it won't be quite so "foreign."
A montessori catalogue I once read included vocabulary cards with vegetables- these would be a great way for kids to "own" the names of veggies at a young age and be able to recognize and sort them.
Wednesday, October 13, 2010
Park Meadows Demo

We will be demonstrating puree making with the Beaba Babycook at the Park Meadows Williams-Sonoma this Saturday from 12-2. If you're out shopping, swing by and say hello! Especially if you're in puree mode, this is a great chance to decide if the Beaba is for you. We use food processors in our classes, but based on Nicole's experience the Beaba is a great tool. By demoing it we hope to also share our business with other parents south of Denver.
Tuesday, October 12, 2010
Pasta E Fagioli

I've had one of those tough mommy weeks. You know, the ones where you just got over some type of bug and your house needs serious attention, your toddler discovered the glory of public screeching when she used to just say, "OK", and you can't leave the house as much because the weather is wet and chilly. Sorry for the complaining, but this is reality, right? Today I needed to plan a dinner that would be comforting and nutritious all at once, and provide leftovers in case I have a few more of "these" days in the next week. Oh, and it had to be an easier recipe for me to take on, so I made a few modifications.
I made this last year, and my stepmom gave me the following ways to make this easier: I cheated on one ingredient, to save time: I used canned cannellini instead of soaking dried beans overnight and therefore cutting simmering time down by at least a half hour. But I followed the recipe's extra little step for giving the soup more body, ladling a few spoonfuls of beans and vegetables into the blender and returning them, puréed, to the pot. I also cooked the pasta separately. This would be an awesome meal for a younger baby, pureed, an older baby with a few teeth, if you strained out bits and pieces, and a perfect meal for all ages. Enjoy! I know we're going to, and tomorrow is a new day, right?
PASTA E FAGIOLI
Serves 10 as a first course or 6 as a main course
3 tablespoons pure olive oil
3 to 4 ounces pancetta, chopped
1 yellow onion, chopped
2 carrots, peeled and chopped
2 celery stalks, chopped
3 large cloves garlic, minced
2 cups (about 14 ounces) dried cranberry, borlotti, cannellini, or other small white beans, soaked overnight in water to cover, drained and rinsed
1 1/2 cups diced canned plum tomatoes, with juices
8 cups water or chicken broth, or as needed
Salt and freshly ground black pepper
1/2 pound small shells, ditalini, or other small pasta shape
Extra virgin olive oil for finishing
Grated Parmesan for finishing
1. In a large soup kettle, warm the pure olive oil over medium heat. Add the pancetta and cook, stirring occasionally, until it renders its fat and is golden, about 5 minutes. Add the onion, carrots, celery, and garlic and cook, stirring often, until the vegetables have softened, about 5 minutes. Add the soaked beans, the tomatoes and their juices, the 8 cups water, and 2 teaspoons salt and bring to a boil. Reduce the heat to low, cover, and simmer until the beans are tender, about 1 hour.
2. To give the soup more body, remove 2 or 3 large spoonfuls of beans and vegetables, place in a food processor or blender, and purée until smooth. Return the purée to the pot. Taste and adjust the seasoning with salt and pepper.
3. Although you can cook the pasta directly in the soup, there is a danger of the soup scorching if the beans have been puréed. To avoid this, bring a large pot of salted water to a boil, add the pasta, stir well, and cook until al dente, according to the package directions. Drain the pasta, add to the soup, and simmer for 5 minutes to blend the flavors.
4. Ladle the soup into warmed bowls, and top each serving with a generous swirl of extra virgin olive oil, a sprinkle of Parmesan, and a liberal dusting of black pepper. Serve at once.
Saturday, October 9, 2010
2 Yummy Purees By Request

For those of you who haven't friended us on Facebook, you can ask questions and make comments on our wall and we will answer right away, especially since Nicole is a social media junkie and probably should seek some sort of therapy for it. Anyways, one of our "students" who recently took a puree class requested some more puree recipes on our blog so .... you ask and you shall receive. Here your go!! See; if there is anything you are wondering or if there's a class you'd like to see us add to our upcoming roster let us know on our Facebook page and we'll address it. For now enjoy a couple super yummy puree recipes that are a perfect fit for a beautiful autumn day.
Butternut Squash & Apple Stew
Ingredients:
½ small, peeled, and diced butternut squash
1 medium apple, peeled, and diced
1½ cups low sodium chicken stock or water
Grape Seed or Olive Oil
Directions:
Heat oil in a saucepan over medium-high heat. Add squash, and apples and cook, stirring occasionally, 8 to 10 minutes. Apples will begin to turn golden. Add stock or water and bring to a boil. Reduce heat to maintain a gentle simmer, cover and simmer until vegetables are soft, 30 to 35 minutes.
Place in a food processor, or food mill and puree to the consistency appropriate for your baby.
Nutrition:
Butternut Squash is high in vitamin C, beta- carotene, potassium, and folate. Apples are high in fiber and antioxidants.
Red Lentils & Rice Super Soup
Ingredients-
2 ¾ cups low sodium vegetable broth
⅓ cup brown rice
½ cup red lentils, picked over and rinsed
Directions-
In a saucepan over medium-high heat, bring the stock to a simmer. Add the rice and lentils. Reduce the heat to low, cover, and simmer gently until the rice is tender, the lentils are very soft and mash easily with a spoon, and most of the liquid is absorbed, 30 to 35 minutes. (The mixture will continue to absorb liquid as it cools.) Remove from the heat and let cool slightly.
Transfer the mixture to a food processor or blender and process to a smooth puree. Add the necessary broth or water to reach the desired consistency for your baby.
Nutrition-
Lentils and brown rice are a nutritious, protein-packed pairing, and lentils have the added benefit of being high in folate. (Folate: Folate helps produce and maintain new cells [2]. This is especially important during periods of rapid cell division and growth such as infancy and pregnancy. Folate is needed to make DNA and RNA, the building blocks of cells. It also helps prevent changes to DNA that may lead to cancer [3]. Both adults and children need folate to make normal red blood cells and prevent anemia [4]. Folate is also essential for the metabolism of homocysteine, and helps maintain normal levels of this amino acid.)
Friday, October 8, 2010
Saturday Market
Thursday, October 7, 2010
Chili Season
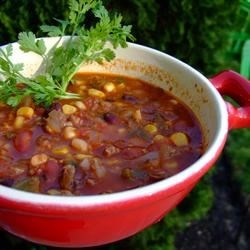
It's fall, and that means breaking out big batches of chili or soup around our place. Chili is wonderful because it's chock full of healthy veggies, legumes, and protein rich turkey (or beef) and can be topped with avocado, sour cream or yogurt, cheese, and cilantro. Ava loves to eat this recipe, but here's what's important to remember so kids aren't reeling from the heat of this recipe:
Whenever you make a super spicy recipe for the whole family, but want to take it down a notch for the little ones, either take out the spicy ingredients (red pepper flakes, serrano chili, etc.) or portion out a little for your little ones to a separate to another pan. Then you can add the adult ingredients and all can enjoy the same meal together- a sure fire way to increase success with any meal. Also, you may want to try spreading the leftovers over baked potatoes for a different meal.
Here's my recent favorite from allrecipes.com. Enjoy!
Wednesday, October 6, 2010
Millet, Tomato, & Avocado Salad - For EVERYONE!

A friend turned me on to this fantastic food blog, Whole Family Fare, a while ago and I have loved all the recipes I have made thus far. This one I made in order to have a quick lunch to pull out of the fridge and serve to both Sofia and I thoughout the week. What I really love is the recipes are truly for the whole family from baby to adult. She simply adds tips on how to alter them slightly to meet the needs of each family member - no matter how many teeth they may or may not have! Enjoy!!
2 cups cooked millet
5-6 cherry tomatoes, halved
1 clove garlic, minced
1 avocado
lemon juice
sea salt
extra virgin olive oil
fresh cilantro or parsley, chopped
Toss everything together. Drizzle a generous amount of olive oil, a tablespoon or so of lemon juice and a large pinch of sea salt. Refrigerate for a couple of hours (or you can serve immediately).
babies 6 months + : puree a small amount of millet with avocado and water/breastmilk, until smooth.
9 months + : serve a little cooked millet with diced avocado.
12 months + : serve as is.
Tuesday, October 5, 2010
Come By to Say Hi!

Mish+Mash Homemade and Stir to Learn Cooking School - our new cooking venue - will be at the Highlands Farmers Market on Saturday from 9 to 1 pm. If you've never been to the Highlands Farmers Market it's located on Boulder St in front of Lola's. It's a small market with lots of good food to eat and fresh produce to purchase. Come have breakfast and see all the new classes coming up at Stir!
Thursday, September 30, 2010
Butternut Squash Risotto
I just made this last night for our family, and everyone ate it up! Little Ava asked for a second serving. Winter squash adds a creamy, sweet texture to foods, plus it's packed with good-for-you vitamins. This recipe is less maintenance than traditional risotto because the harder grains need to cook a bit longer and don't require as much checking, and it has more bite than traditional arborio would. Enjoy!
Oh, and you could use this for your smaller babies- for the beginners, just set aside some squash and steam or roast, then puree. For 9 months +, you could simply mash this up to a palatable consistency. For toddlers, hand them the spoon and let them go to town along with the older kids and adults.
Mixed Grain Risotto with Butternut Squash and Herbs
2 Tbsp extra virgin olive oil
1/3 cup chopped onion
3 cups butternut squash, cubed (frozen or fresh, see directions)
1/2 cup each brown rice, pearl barley, and wild rice
1/4 cup dry white wine (optional- for adults)
6 cups low sodium chicken or veggie broth
1/2 cup grated parmesan and more for garnish
1/4 cup chopped fresh rosemary or thyme
salt and freshly ground pepper
1. Heat oil in medium pot over medium high heat. Add onion and cook, stirring occasionally, until just softened, 2 to 3 minutes. Add 1/2 of squash if frozen, all of squash if fresh, and cook, stirring occasionally, until soft. Add brown rice, barley, and wild rice; toast, stirring often, for 2 minutes. Add wine (if using) and cook one minute more. Add broth, bring to boil. Partially cover pot, reduce heat to medium low, and simmer, stirring occasionally, until rice and barley are tender and risotto is thick and slightly soupy, about 45 minutes.
2. Stir in rest of squash if you used frozen and cook, uncovered, until tender, 3 to 4 minutes. Remove from heat; stir in cheese, herbs, and any other seasonings. Salt and pepper to taste, and garnish with parmesan upon serving.
Tuesday, September 28, 2010
A Couple Events Not to be Missed!

There are a couple of super awesome events happening this weekend that you will not want to miss!
First, the Horseshoe Craft & Flea Market featuring local crafters, designers, and antique dealers runs Saturday October, 2nd from 8 am to 3 pm at 46th and Tennyson in Northwest Denver. A great place to stock up on some unique holiday gifts!!! Support local businesses and come check it out.
Second, the third Justice League of Street Food party is Friday October 1st from 5pm to 9pm in a vacant lot at 29th and Huron behind Coors Field. If you haven't made it to the first two don't miss out again! This one has an 80's theme so come decked out and you could win some fab prizes. Or come as you are and simply enjoy the wonderful food truck delicacies that Denver has to offer.
What are you up to this weekend that we should know about?
Apple Pie Fries
I think I found a way to use all of my extra apples around the house- and what a fun way to jazz them up a little! This would be a great dessert or snack. I'll be trying this recipe this afternoon. Let me know if you enjoy it!
Apple Pie Fries
Ingredients
- 1 medium-sized sweet red apple (Fuji apples cook really well!)
- 1/2 +1/8 teaspoon of ground cinnamon
- 1/8 teaspoon of ground cardamom
- 1/8 teaspoon of ground allspice
- 2 teaspoons of raw sugar
- 1 pinch of sea salt
- Canola oil spray (to lightly coat pan)
- Peanut butter (optional - for dipping the hot apple pie fries)
- Honey (optional - for dipping the hot apple pie fries)
Preparation
1. Lightly coat a pan with canola oil spray, and raise to medium-high heat on the stovetop.
2. Slice the apple into steak-fry-shaped wedges, and place the wedges into a large mixing bowl.
3. In a small bowl, combine the ground cinnamon, cardamom, and allspice, and the raw sugar and sea salt.
4. Pour the spice mixture formed in Step 3 over the apple wedges in the large mixing bowl, and toss the wedges to completely coat them in the mixture and to ensure that the flavorings are evenly distributed.
5. Place the flavored apple slices into the preheated pan, and cook for approximately 2-3 minutes, turning the apples approximately halfway through the cooking process. (KewlTip: Be careful not to overcook the hot apple pie fries, so as to preserve the natural flavor, sweetness, and crispy crunch inherent in the raw apples!)
6. While the apple wedges are cooking, place the peanut butter and honey in small separate bowls for dipping the hot apple pie fries into, if using.
7. When the hot apple pie fries have completed cooking, remove from the pan and serve. Dip them into the peanut butter and honey.
Serving Size
Makes approximately 5-6 servings
Monday, September 27, 2010
What's Cookin...
We would already be excited about this, but we're doubly excited because we've been offered the opportunity to teach some of our classes out of Stir's kitchen. Nicole and I have started playing with classes, and there are going to be some awesome offerings for parents to get a night away and learn recipes (with take home samples), all in the context of a cooking school.
In the meantime, we're going to keep our puree class at Spiral Wellness and Yoga, and all other classes will also be offered in home.
Saturday, September 25, 2010
Restaurant Friday

There aren't any real guidelines to choosing restaurant's to feature in our kid friendly choices, however I try to find ones that think past the typical kids menu fare. We love to go out for sushi and when it comes to cool food presentation it really is such a visual food experience. Kids are extremely visual so small rolls of food that can be easily picked up and eaten should be a kids meal dream. But most sushi restaurants don't have separate menus for kids (which also means lower prices). Most likely, they consider sushi to be adult food, except for Hapa Sushi in Cherry Creek. They have a great choice of sushi and non sushi options just for our little gourmets. Sofia loves vegetable sushi and I make sushi rice for her all the time. It clumps together and makes it easy to pick up with a fork or even with her fingers. Here's a sample of what Hapa's menu offers:
- Teriyaki beef & rice
- Peanut Butter & Jelly rolled in bread
- Half orders of sushi rolls
- Noodles & Vegetables in a light Japanese sauce
I encourage you to take your kids to all different types of restaurants instead of just sticking to the kid friendly generic ones. It's a great way to teach them about different cultures. My one bit of advice is to keep in mind that while all restaurants welcome kids some have different expectations. While some are open to kids running free others aren't and it's up to us as parents to know our kids limits and to respect the type of restaurant we are taking them to.
Thursday, September 23, 2010
Massive Infant Formula Recall
By MATTHEW PERRONE, AP Health Writer – Wed Sep 22, 8:47 pm ET
WASHINGTON – Drugmaker Abbott Laboratories said Wednesday it is recalling millions of containers of its best-selling Similac infant formula that may be contaminated with insect parts.
The voluntary action affects up to 5 million Similac-brand powder formulas sold in the U.S., Puerto Rico, Guam and some Caribbean countries. The company said the products may contain a small beetle or larvae, which could cause stomach ache and digestion problems.
The recall does not affect any liquid formulas or other Abbott-brand products.
A company spokeswoman said Abbott uncovered the insects last week in one section of a manufacturing plant in Sturgis, Michigan.
"We immediately shut down that one area and began an investigation," said Abbott's Melissa Brotz. "We're in the process of resolving it now." Abbott manufactures Similac at several U.S. sites.
Brotz said the company has been consulting with the Food and Drug Administration, which determined there was no "immediate health risk" from the contamination.
Consumers can enter the lot number on their containers online to determine if they are subject to the recall. The products should be returned to Abbott for a full refund.
"Delivering anything less than the highest quality infant formula is unacceptable to us," said Brotz. "We will do whatever is necessary to maintain the trust of parents in the coming weeks."
The affected products were sold in plastic containers and various can sizes, including 8-ounce (227-gram), 12.4-ounce (352-gram) and 12.9-ounce (366-gram).
Similac is the best-selling infant formula in the U.S. Abbott's nutritional products — which include adult brands like Ensure — had sales of $5.3 billion last year.
Abbott expects to lose $100 million in connection with the recall. However, the North Chicago, Illinois, company confirmed its third-quarter earnings guidance between $1.03 and $1.05 per share.
Shares of Abbott Laboratories fell 16 cents to $51.99.
Wednesday, September 22, 2010
Pumpkin Pancake Revision and Book Rec
Last night at an in-home workshop, I was speaking with a mom who uses our blog recipes (yay!) and we were commiserating about my pumpkin pancake post. I posted that recipe based on another time I had tried it and it worked, but people, I have to revise. Sorry. The old one just doesn't cook as well as I remembered- it's too wet and the middle always remains, well, wet. My little one still gobbled them (what a nice taste tester!) but my honest taste testers called for a revision. Thanks, Meg, for bringing it up, and thanks for following! I guess cooking, just like anything, calls for adaptations and adjustments now and then.
So I'm going to delete the old one and share this one from Allrecipes.com- a great resource with ratings from folks who have tried the recipes. Notice that it uses white flour which would soak up the moisture better, but uses a whole lot less butter. It claims to be fluffy- I'm going to test it out soon.
Another book rec I'd like to share from a mommy point of view is Happiest Toddler on the Block, by Harvey Karp, MD. Yes, the guy who we all know wrote Happiest Baby on the Block also wrote a toddler book, and I was surprised at how helpful this one was. He has a refreshing view of toddlerhood and its developmental stages, along with ways to be proactively reinforcing about positive behaviors and nip "yellow" and "red" light behaviors in the bud. Every strategy I've tried has worked from this book. He also goes over the few things we really can't control about toddlers: what they eat and when they go potty, and uses the strategies he teaches to help you along on those journeys.
Happy reading, and let me know about those pancakes!


